Whiteley Creek Homestead

LIFE AT THE END OF A DIRT ROAD IN CENTRAL MINNESOTA

organically grown triticale in our field
canoeing in our wetlands
raspberries growing wild on our property
our back porch fieldstone fireplace
  • If I was the head cook in a school cafeteria, this is what the students would be served on their lunch trays… garbanzo bean sandwich filling on a slice of homemade whole wheat bread or a piece of lettuce, yogurt (mine is from my second homemade batch), pomegranate juice, and cucumber slices. The garbanzo bean mixture is seasoned with dillweed. Dick's opinion… the recipe is a keeper. Super simple and you can't go wrong with dill flavor.

    Garbanzo bean dill sandwich filling 

    garbanzo bean sandwich filling

    1 can garbanzo beans

    1/3 c diced onion

    1/3 c chopped dill pickles  

    shredded carrots

    2 tbsp mayo (I used grapeseed oil vegenaise.)

    1 tsp dillweed

    Mash beans with a fork until they are broken apart. Mix all remaining ingredients together in a bowl then add beans and stir. Sprinkle with seasoning salt to taste either in bowl or after spreading filling on a slice of bread or piece of lettuce.


    April 15, 2009

    Today's mileage: 2-mile walk

    Total mileage for April: 54.25 miles

    Bible reading? Yes.

  • Tea towel bread bag 

    I have embarked on a journey back to the era of preplastic. For several years, I have stored leftovers in emptied jars with lids that once held things like pickles, peanut butter, applesauce, and olives. I bring fabric bags to the grocery store to carry my purchases home in. I bring my own jars to the local food co-op to fill with bulk baking supplies… flour, nuts, seeds, grains, and spices/seasonings. I have been baking my own bread, therefore it eliminates the store-bought bread bag, however I was placing my homemade bread in a plastic storage bag (i.e., Ziploc, Glad), so I had made absolutely no progress with that segment of my plastic-free goal. So today I sewed a cloth bag with a drawstring to store my homemade loaf of bread instead of using  a plastic bag. Amanda Soule, on her blog soulemama.typepad.com, shared the idea recently after some research into how bread used to be stored "before we had preservatives keeping our bread longer or tupperware in which to store it". The bag is made from a vintage tea towel with the hemmed sides cut off to use as a drawstring. So clever and quick to make.

    April 14, 2009

    Today's mileage: 0 

    Total mileage for April: 52.25 miles (same as yesterday) 

    Bible reading? Yes.

  • Milkman 

    This fun page came from a book titled What will I be from A to Z copyright 1959. It is a book depicting a different career for each letter of the alphabet. Even though it was published by the National Dairy Council, this is the only page that makes reference to the dairy industry other than an ice cream maker for the letter "I". Some others included are quarterback, rocket builder, soldier, United States Congressman, violinist, and weatherman. The colors and every drawing is just as cute as this one.

    I was curious to know if milk is delivered to homes anymore and it is! My google search came upon Smith Brothers Farms in Kent, Washington that delivers organic hormone-free milk and other dairy products like cheese, butter, yogurt, and cottage cheese… plus eggs to homes in the Seattle area. Even though the milk isn't delivered in glass jars as in former years, it arrives once a week in "paperboard" containers. Digging deeper I uncovered home milk delivery companies in Minnesota… New Prague, Hastings, Babbitt, and in the Twin Cities. I'm sure there are more. Although there is no home milk delivery in the Brainerd Area, I do purchase my milk from a local dairy in old-fashioned glass bottles through my food co-op. My nostalgic side tends to hang on to such things from the past… glass milk bottles, outdoor clotheslines, old-fashioned letter writing, a mailbox on a dirt country road, a whistling teapot, aprons, a well-worn domed metal lunch pail holding a waxpaper/parchment paper-wrapped sandwich alongside a mason jar filled with lemonade or homemade ginger water. Oh, yea… those are the things that bring a smile.    

    April 13, 2009

    Today's mileage: 2-mile walk

    Total mileage for April: 52.25 miles

    Bible reading? Yes.


  • Hen and putty egg 

    Shortly before sunrise this morning… 6 a.m. to be exact, three bleary-eyed but glad-we-decided-to-do-this bodies inhaled deeply the fresh moisture-laden air and listened to the birds' chorus waiting for an outdoor Easter service to begin. Dick, our daughter Jessie, and I chose to begin Easter Day at a park in Eustis, Florida a few minutes away from the town where Jessie resides. The service began with the most amazing artist, whose work was projected onto a huge screen set up on an outdoor stage. In fluid ballet-like movements, he guided his hands and fingers across a glass surface sprinkled with a black powder creating detailed scenes that depicted Jesus journey in the final days of His life on Earth leading up to His crucifiction through resurrection. The process was much like finger painting, but the black powder produced realistic shadows and depth in faces and the landscape. When the retelling of one portion of the story was complete, the artist tossed a handful of black powder over the glass surface obliterating the scene so he could begin anew. Coupled with the captivating visual presentation, powerful background music further enhanced the emotion-filled retelling. Jessie's research turned up a segment of "The Passion" performance, that we saw at the sunrise service, on YouTube by Joe Castillo with music by John Debmey. Here's also a narrated version. I strongly urge you to suggest to your pastor that the full performance be shown at your church on Easter Sunday next year… powerful. That's all I can say.

    Since our day literally began at the crack of dawn, by 11:30 a.m. we had attended a memorable Easter service, biked 11.5 miles along the most beautiful lake in the coolness of the morning, and stopped to eat a picnic lunch at a park. We also made note of a coffee shop and a small town cafe in Eustis (Florida) that will be included in future bike trips.

    I took one look at the silly putty "flowing" out of its capsule and thought it looked like a cracked egg, so it became a reminder that this season is one of new life bursting forth in nature all around us… of rebirth…of joy in knowing that Jesus suffered and died on the cross for our sins so that, on this day we call Easter Sunday… and throughout the year, we may celebrate the gift of eternal life. 

    April 12, 2009

    Today's mileage: 11.5 mile bike ride

    Total mileage for April: 50.25 miles

    Bible reading? Yes.

  • Dick and I are spending the weekend at our daughter Jessie's, so I made a pot of beef stew and baked a loaf of honey whole wheat oatmeal bread to bring along. My friend Sheila gave me the idea when she posted a stew recipe on her blog recently. I hadn't made stew in quite a long time and her photo sealed the deal. It can be reheated and in no time at all you're enjoying a hearty meal. My recipe that I've used for years is basically the same as Sheila's but with some additional seasonings and beef broth instead of water. In the summer, it's the perfect opportunity to use in-season veggies from your garden or farmers market, as well as a variety of whatever veggies you have hanging around in your fridge.

    Old-time beef stew 

    Old-Time Beef Stew

    3/4 lb stew meat, cut into very small cubes

    1 large onion, chopped

    4 cloves garlic, minced

    3 tbsp flour + 1 tsp paprika

    32 oz. beef broth (or stock)

    2 bay leaves

    1/2 tsp. pepper

    1/2 tsp each dried marjoram, thyme, & rosemary

    2 tsp. Worcestershire or Bragg’s Liquid Aminos

    1 can diced tomatoes (optional)

    3 potatoes, diced

    4 carrots, sliced

    2 stalks celery, chopped

    fresh or frozen peas

    In a soup pot, brown meat in 1 tbsp olive oil until you have good caramelization in bottom of pan. Sauté onion until just barely translucent then stir in garlic, flour, and paprika. Add beef broth (or stock), bay leaves, seasonings, and Worcestershire or Bragg’s then heat. Simmer covered for 1 hour.  Add veggies except peas. Cover and cook approximately 30 minutes until vegetables are fork tender but not mushy. Add peas the final 5 minutes of cooking time. Adjust taste by adding your favorite seasoning. Try it in your crock pot, too.


    April 11, 2009

    Today's mileage: 2-mile walk + 5.5 mile bike ride

    Total mileage for April: 38.75 miles

    Bible reading? Yes.

  • The search is over… When I was shopping in our local health food store last week, a lone box containing a yolife yogurt maker sat on the shelf. I figured it was a sign so I could cease pondering over what brand I should purchase. A Bon Jovi song began circulating in my brain triggered by the yolife name… "It's my life. It's now or never. I ain't gonna live forever. I just want to live while I'm alive." Oh, yea… my mind strays more often than I care to admit.

    Yolife yogurt maker 

    I started my first batch with my new yogurt machine last night by heating a quart of milk to 176°F-185°F, according to the directions in the machine's instruction manual, or 170°F according to Heidi Swanson's 101cookbooks.com blog. An option that is suggested by Heidi to create a thicker yogurt especially if using skim or 1% milk, is to add 1/3 cup powdered milk. I prefer to use whole milk without the powdered milk. The next step is to cool the milk to 104°F-113°F, or 108°F-112°F according to Heidi's instructions.

    After cooling, the next step is to activate the milk by adding a starter culture powder that can be purchased in the refrigerated section at a health food store or co-op. It contains the bacteria that you find in store-bought yogurt (L.bulgaricus, S.thermophilus, L.acidophilus). Alternatively, you can use 1/2 cup plain yogurt in place of the starter. Heidi recommends Stonyfield Farm yogurt because it claims to have three additional "live active cultures" (making a total of six) including L. Acidophilus, Bifidus, L. Casei, and L. rhamnosus. You can save 1/2 cup of the present batch of yogurt as a starter to make the next batch, if you like, but the strength of the cultures decline after several batches then you need to go back to a starter powder or Stonyfield Farm. My yogurt maker's instruction booklet says "no more than 5 consecutive generations because the active cultures in each successive batch will diminish over time." (Note: Now that I have many batches of yogurt under my belt… literally and figuratively, I prefer using yogurt like Stonyfield for the starter. The starter powder produces a more tart flavor.) Incorporating the yogurt into the milk is easier if you mix a small amount of milk into the yogurt to break it up then add it to your pan of milk. Lastly, after putting the jars filled with the prepared milk in the machine, you place the domed lid on top and plug the machine in. It takes 4 to 8 hours for it to do its thing. It's the freshest tasing yogurt I've ever had, which makes perfect sense because it doesn't come any fresher than this!

    There are many styles of yogurt makers. I like my Yolife brand because I can use the seven 6-ounce jars that come with the unit, or, by swapping out the shorter cover with a taller one, it will accommodate larger containers of varying heights like quart mason jars, recycled jars from pickles, olives, baby food, or peanut butter instead of the seven 6 oz. jars provided. 

    Yolife high domed lid 

    April 10, 2009

    Today’s mileage: 2-mile walk

    Total mileage for April: 31.25 miles

    Bible reading? Yes.

  • Maybe you've never made an omelet, so you are unable to appreciate the skills required, or you've attempted one and said, "Never again!" I've had my share of disasters that looked very much like my daughter Lisa's attempt…

    Lisa's omelet 

    Making an omelet is on my "bucket list"… things I want to accomplish before I "kick the bucket". So I read as much as I could and watched Food Network everytime I got wind of a segment on omelets. I tried and tried again (not on my B&B guests) using newfound tips until my success has proven consistent enough to share what I learned. I always find Alton Brown from Good Eats on the Food Network Channel to be so helpful because he explains why you need to do things a certain way. I will share my notes from his most recent segment interspersed with tips I've learned here and there. I use a combo of whole eggs and egg whites in my omelet because, despite a yolk being the source of cholesterol, it is jam-packed full of important nutrients. So as not to overload on cholesterol in one day, I pump up the volume by adding in egg whites. This is an Applegate Farms uncured turkey bacon and cheese omelet that I made this morning for breakfast. 

    Bacon and cheese omelet 

    French Omelet Serves 2

    5 eggs, warmed in hot tap water for 5 minutes (You'll be using 3 whole eggs and 2 egg whites.)

    2 tbsp milk or water, optional

    pinch salt

    1 tbsp room temperature butter

    filling choices

    non-stick pan with gently sloped sides

    Eggs are warmed to bring them to room temperature so they don’t cool the heated pan. Room temperature butter is used so that it melts evenly in the pan. Otherwise, by the time the last bit of butter melts, the first melted butter is starting to burn. Crack 3 room temperature whole eggs plus 2 egg whites in bowl, then add milk or water (optional) and salt. Blend with fork. Alton suggests using a fork rather than a whisk to prevent excess air bubbles. Heat an 8 or 10-inch non-stick pan over medium to high heat. (I use low heat to prevent browing the omelet.) The omelet’s thickness is determined by which of the two sizes you choose to use. Once the pan is hot, add olive oil or room temperature butter (it should sizzle gently) and swirl the pan to distribute the butter as it melts. If you like, you can use clarified butter which is “butter that has had the milk solids and water removed. One advantage of clarified butter is that it has a much higher smoke point, so you can cook with it at higher temperatures without it browning and burning. Also, without the milk solids, clarified butter can be kept for much longer without going rancid.” (www.ochef.com) Once the butter foams (it should not be browned), turn the heat down and pour eggs into center of pan. Stir vigorously with rubber spatula for 5 seconds as you gently shake the pan back and forth to cook evenly. As soon as a semi-solid mass begins to form, lift pan and swirl around until the excess liquid pours off into pan so the top layer of uncooked egg can reach the pan’s heat. This step also prevents the eggs from browning on the bottom. Using your spatula, move around the edge of the egg mixture (sweep) to loosen edge. Let omelet sit in pan 10 seconds without touching. Shake pan to loosen omelet. If using an 8"pan, the omelet is thicker and therefore more difficult to cook the top layer. Through trial and error, I found that placing it in a 275 degree oven for about 5 minutes, at this point in the process, ensures that the eggs are fully cooked without producing a browned top or underside. (The thicker omelet produces a fluffiness less attainable with the thinner omelet produced when using a 10" pan. That's why I go through this extra trouble.) Lift up the far edge of the pan (the side opposite the handle) and snap it back towards you to fold over 1/3 of the omelet. I haven’t mastered this movement yet, so I just took my spatula and folded it over. Alton then sprinkled fillings on the remaining 2/3 of the omelet. If you look at my photo, you will see that doing it this way produces one layer with no fillings, so I prefer scattering the fillings over the entire surface of the omelet then fold over 1/3 of the omelet. This makes a fatter roll. You can also scatter the fillings down the center. Slide omelet onto plate and fold over so that the omelet is a tri-fold. (The folding over takes place as you slide the omelet out of the pan.) Lightly coat the top with melted butter or olive oil so that a sprinkling of herbs will adhere to it. I can’t remember where I saw it done, and I forgot to do it for this photo but, if you cut the omelet diagonally rather than straight across, it makes a prettier presentation. You can even stand smaller chunks (by cutting omelet into 4 pieces instead of 2) on end for a different look yet. Keep practicing. It will so be worth the effort when one day you have mastered the omelet and breakfast will never be quite the same again. 

    April 9, 2009

    Today's mileage: 2-mile walk

    Total mileage for April: 29.25 miles

    Bible reading? Yes.


  • On eatingwell.com, you can sign up for "health e-savers coupons" and you will receive coupons in your inbox to print. Presently, there are three that excite me. One is "Buy any 2 Organic Valley Products. Get $2.00 off." The other two coupons really really excite me.  They are both for Endangered Species Chocolate… $1.00 off 2-3 oz. bars and $0.75 off bite-sized treat pouches. The chocolate is made with "ethically traded milk and dark chocolate and 10% of the company's net profits are donated to help support species, habitat, and humanity."

    Endangered species chocolate

    I used an Endangered Species chocolate bar to make delectable morsels of cashews and dried cranberries coated in melted dark chocolate… a recipe from Food Network's Ellie Krieger. These clusters are a variation of a dark chocolate walnut bark recipe that I made in January. Each recipe is equally as good for a quick nutritious treat.

    Chocolate clusters    

    Cherry Almond Chocolate Clusters

    1 cup almonds, coarsely chopped (I use slivered almonds. Cashews or walnuts, chopped, work too.)

    ½ cup dried cherries, coarsely chopped (Dried cranberries are good, also.)

    6 oz. dark chocolate, finely chopped (For reduced fat use 3 oz. which equates to one whole Endangered Species chocolate bar. It’s enough to hold the clusters together.)

    In a medium bowl, toss together the almonds and cherries (or cranberries). Line a baking sheet with waxed paper. (I used unbleached parchment paper.) Melt the chocolate in the top of a double boiler over slightly simmering water with the lowest possible heat, stirring frequently. Make sure the water isn’t touching the underside of the top pan. Remove the double boiler from the heat. Stir the fruit-nut mixture into the chocolate. Spoon out heaping tablespoon-size clusters of the chocolate onto the baking sheet about 1-inch apart. Put them in the refrigerator to set for about 15 minutes. Store and serve at room temperature.

    April 8, 2009

    Today's mileage: 2-mile walk

    Total mileage for April: 27.25 miles

    Bible reading? Yes.

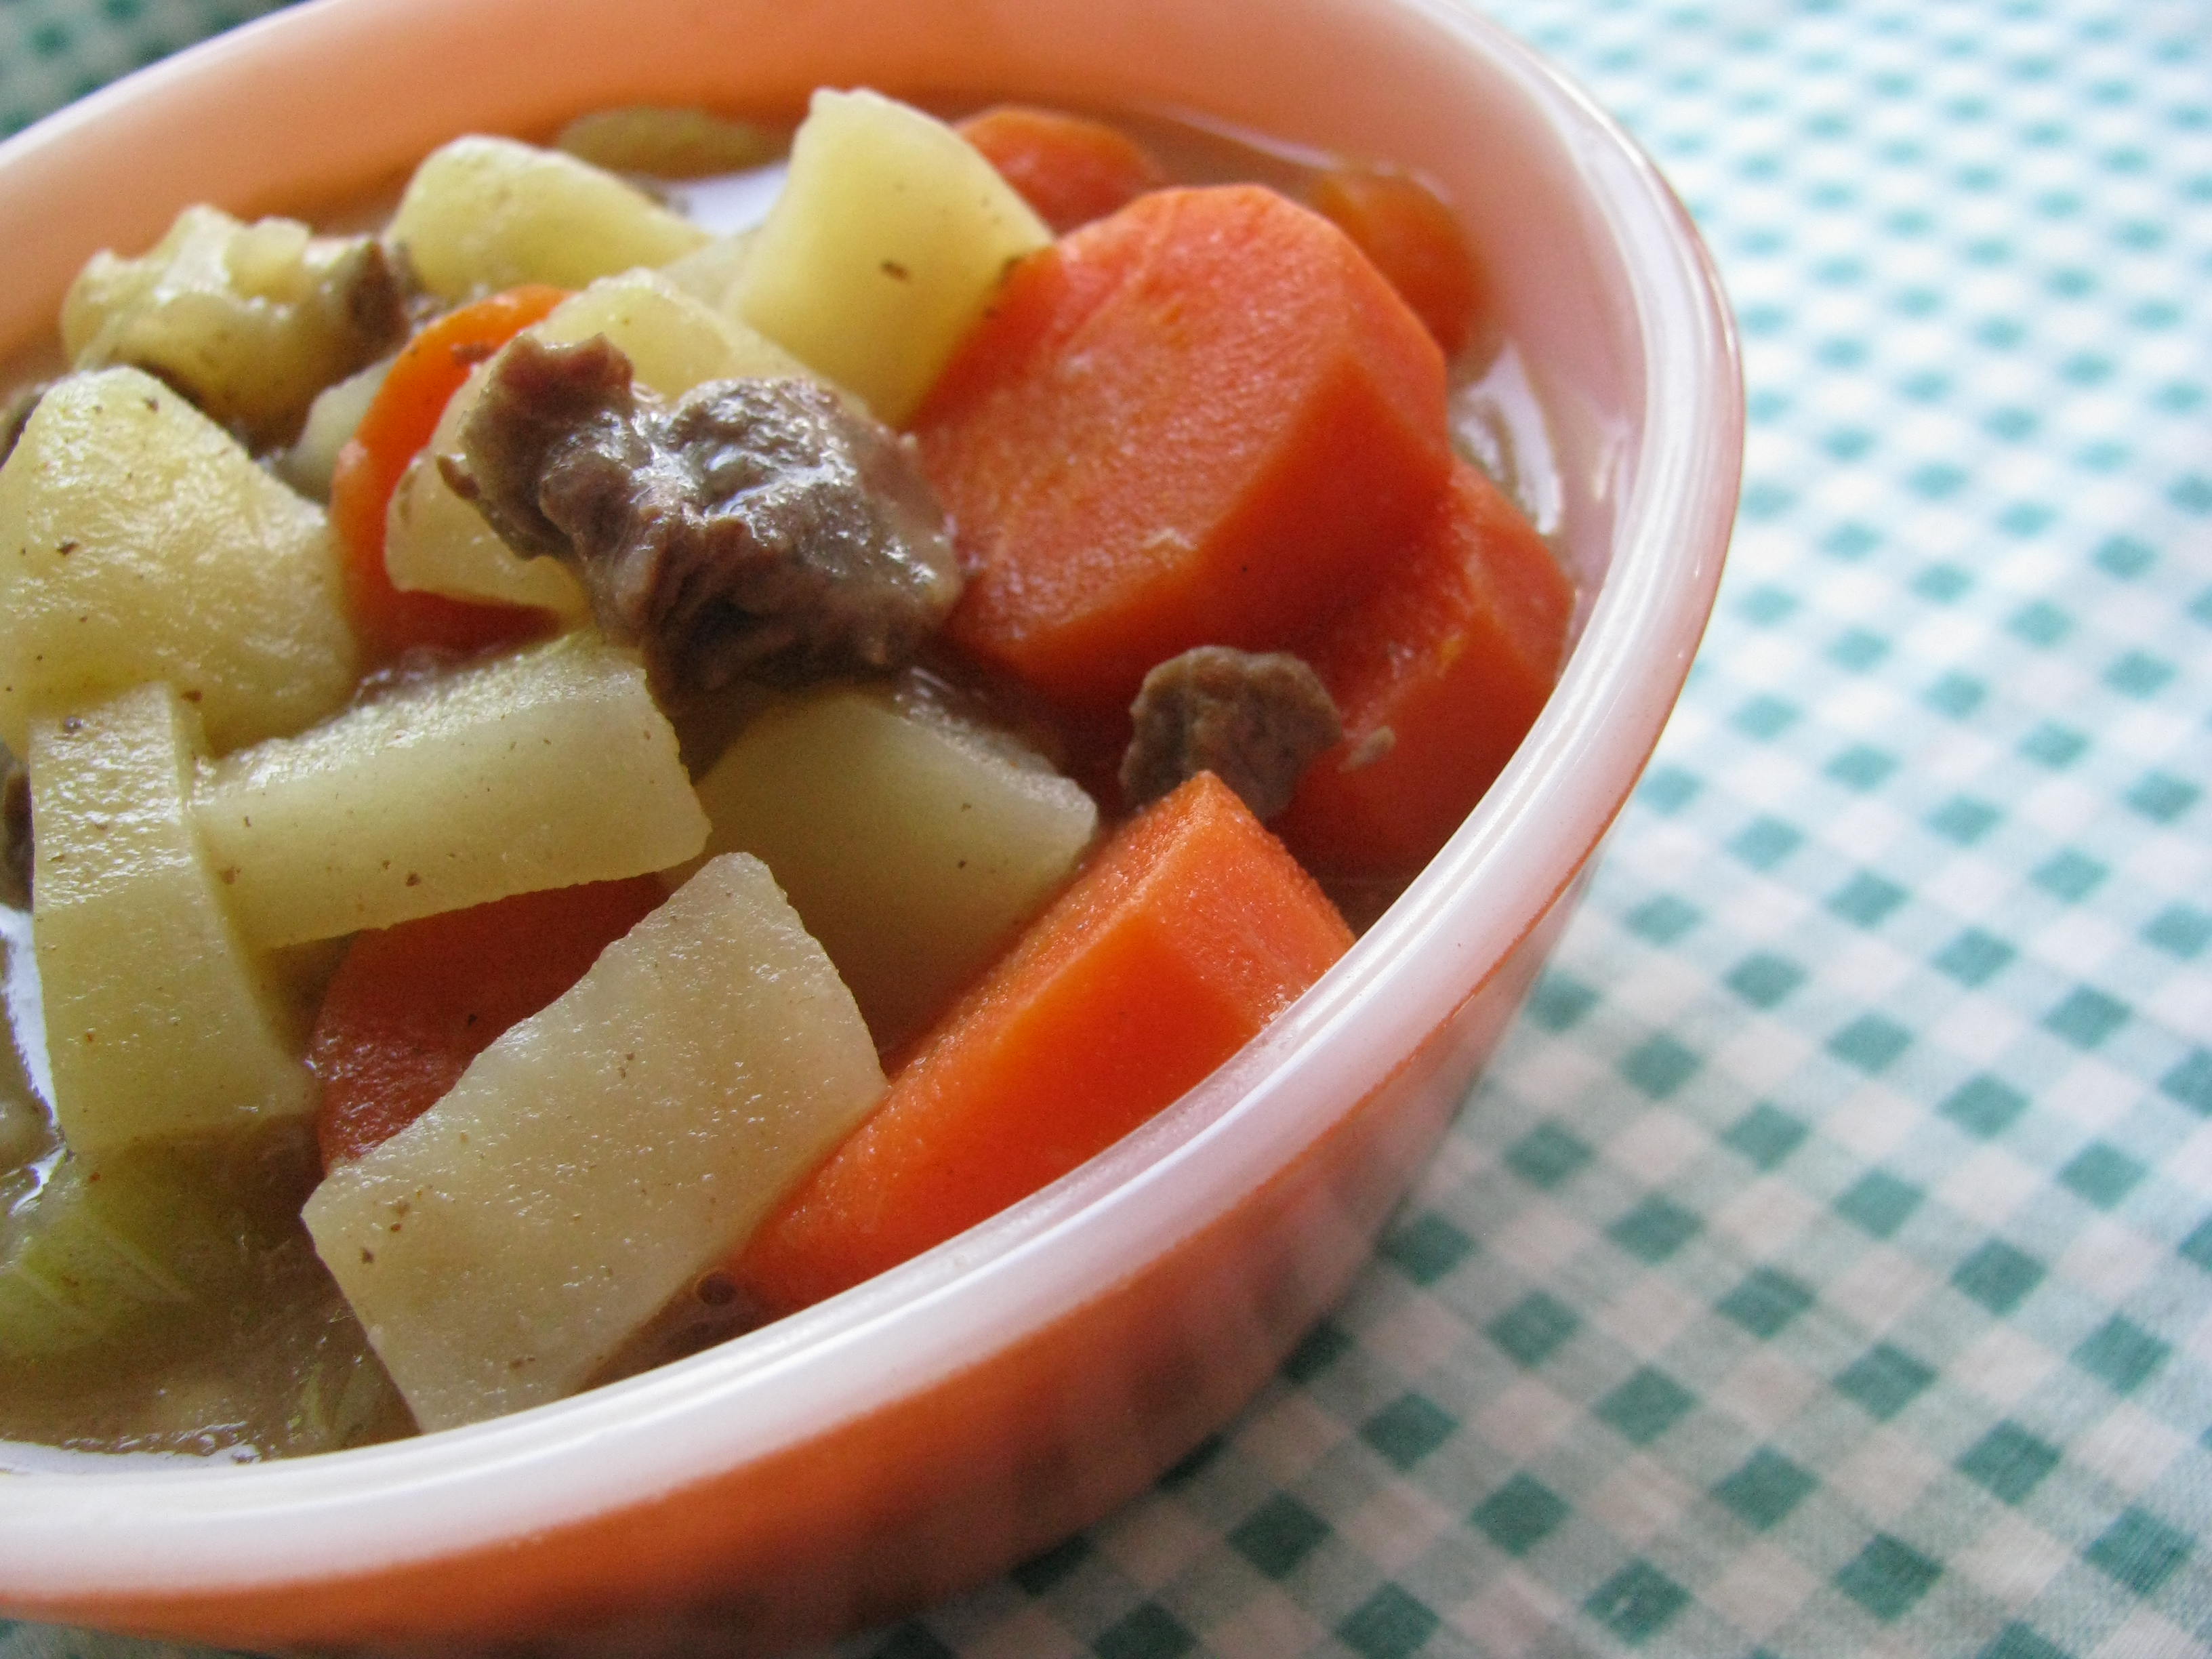
  • My tax prep is behind me and I can officially express, "Good riddens until your return visit next year!" To celebrate this annual milestone, Dick and I always eat lunch out. We especially enjoy a swiss steak dinner at our nearby Reececliff's Restaurant. The tender Swiss steak and mashed potatoes, smothered in a tomato gravy, is served once each week. I can never remember which day this special is offered. Today was it! Although we frequently finish our meal off with a homemade slice of pie, we were filled to the brim. So, upon our arrival back home, I mixed up this quick snack to satisfy our craving for a little sweetness. I received this Martha Stewart "Cookie of the Day" recipe in my email inbox today that was originally published in the April 2007 issue of Everyday Food… high fiber, complimentary flavors, nice crunch, and very addictive!    

    Peanut butter granola 

    I scooped a handful into each of these cheerful snow cone cups with holders from Target.

    Snow cone cup and holder

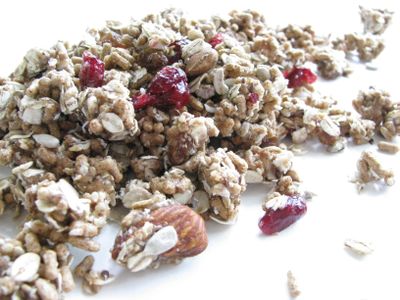
    Peanut Butter Granola

    1/3 1/4 cup honey

    ¼ cup natural peanut butter (I sometimes use almond butter.)

    2 tbsp unsalted butter 1 tsp olive oil

    1 cup crisp rice cereal (I use Nature’s Path Smart Bran Cereal.)

    1 cup old-fashioned oatmeal (I use Seitenbacher Musli #21. Bob's Red Mill Old Country Style Muesli is a good choice also.)

    ¼ c dried fruit like raisins, dates, and apricots (Since the musli has dried fruit in it, I just added 2 tbsp dried cranberries.)

    If not using Seitenbacher Musli, you might want to add a variety of nuts and seeds like cashews, almonds, and raw hulled sunflower seeds. In a small saucepan, heat honey, peanut butter, and oil (or butter). Stir until loosened, 1 to 2 minutes. (Melt just until mixture is easy to stir. If you overcook, the end product will be dry.) Remove from heat; stir in cereal, oatmeal (or musli), and dried fruit. Drop mixture by tablespoon into mini cupcake or candy liners… or just spread the mixture on a parchment paper-lined baking sheet and refrigerate until set, about 15 minutes… or just dig in. It’s seriously too good to fuss. To store, refrigerate in an airtight container up to 1 week. Don’t bother. It’s not going to last long enough to require refrigeration. Note: This recipe makes 24 balls, however my version doesn’t clump together in balls because of reduced honey and substitution of oil instead of butter.

    Seitenbacher Musli #21  

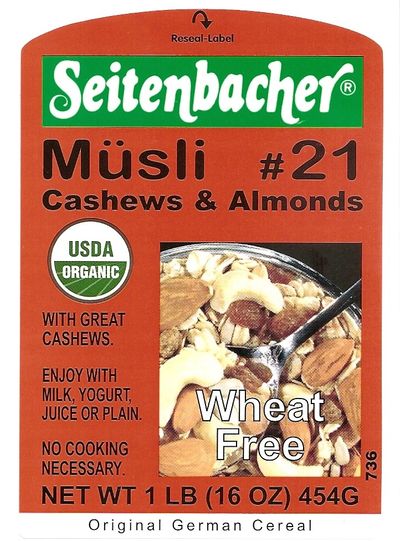
    Seitenbacher Musli can be ordered online. Shipping is $5.00 no matter the quantity ordered and the service is speedy. I order 12 packages at a time because, in addition to this granola recipe, I toss a handful into cookie dough to increase the nutritional value and crunch factor. There are many varieties. #21 happens to be a favorite of mine. It contains organic everything… rolled oats, barley flakes, raisins, cashew kernels, almonds, dates, apricots, sunflower kernels, flax seeds, and sesame seeds with no preservatives, colors, or artificial flavors. By substituting Seitenbacher's Musli for oatmeal and Nature's Path Smart Bran with Psyllium & Oatbran for crisp rice cereal (i.e., Rice Krsipies) in this granola recipe, it drastically pumped up the fiber and flavor. I highly recommend these recipe substitutions.     

    April 7, 2009

    Today's mileage: 0 (I was too busy celebrating my tax prep completion.)

    Total mileage for April: 25.25 miles (Same as yesterday.)

    Bible reading? Yes


  • I used the red lentils and orange cauliflower, that I highlighted in yesterday's post, to make a pot of red lentil curry soup using ingredients from two soup versions found on epicurious.com and in a Washington Post Newspaper. Red lentils, which are actually bright orange rather than red, lose their orange color in the cooking process, so display them in a jar on your kitchen counter to fully enjoy their beauty. Red lentils cook rapidly in 15-20 minutes compared to green, brown, or yellow lentils which take 45 minutes. Red lentils produce a mushier texture, whereas the other lentils retain their shape. I like curry and hadn't used that particular seasoning in a while, so I chose to feature that particular flavor. It turned out to be a good choice for this particular soup and one I will repeat again.

    Red lentil curry soup 

    Red Lentil Curry Soup

    ½ onion, chopped

    2 cloves garlic, minced

    2 c chicken broth + 3 c water (I replace the water with 2 c carrot juice + 1 c water or I use 4 c chicken broth + 1 c water.)

    1 potato, diced

    2 carrots, diced

    1 cup uncooked red lentils, rinsed

    ¼ tsp ground red pepper (cayenne)

    ½ tsp curry (I used ¼ tsp.)

    2 bay leaves

    2 cups cauliflower florets

    Salt and pepper to taste (I use Johnny’s seasoning salt and
    garlic pepper.)

    In a medium sauce pan, sauté onion in 1 tbsp olive oil until translucent, but not mushy, adding garlic near end of cooking time. Add the broth, water, potato, and carrots. Bring to a boil, reduce to simmer and stir in lentils, cayenne, curry, and bay leaves. Cover and reduce heat to low. Simmer for about 10 minutes, stirring occasionally to be sure the lentils are not sticking to the bottom of the pan. Add the cauliflower and cook for another 5-10 minutes. (Cauliflower should be tender but somewhat firm.) Makes 4 hearty bowls.


    April 6, 2009

    Today's mileage: 7.75-mile bike ride

    Total mileage for April: 25.25 miles (It's April 6th and I'm already 1/2 way to my monthly goal of logging 50 miles!)

    Bible reading? Yes